

Hello, hello! Welcome to today’s post.
I’ve been itching for a project lately. I needed a quick DIY to do. I’ve had this plain chalkboard for a while, and I really wanted to spruce it up. One trip to the craft store and a few hours later, I had this beautiful chalkboard that you can see above.
Don’t have a chalkboard? No problemo. This DIY is perfect for a mason jar, a vase, a candle holder–whatever you want. However, a great place to find a chalkboard is a craft store or a garage sale.
Once you have an object of your choice, we can get started!
If I’m being 100% honest, you could probably buy fancy gold tape and put it on the edge of your chalkboard. But what’s the fun in that?! It’s way more fun to paint it.
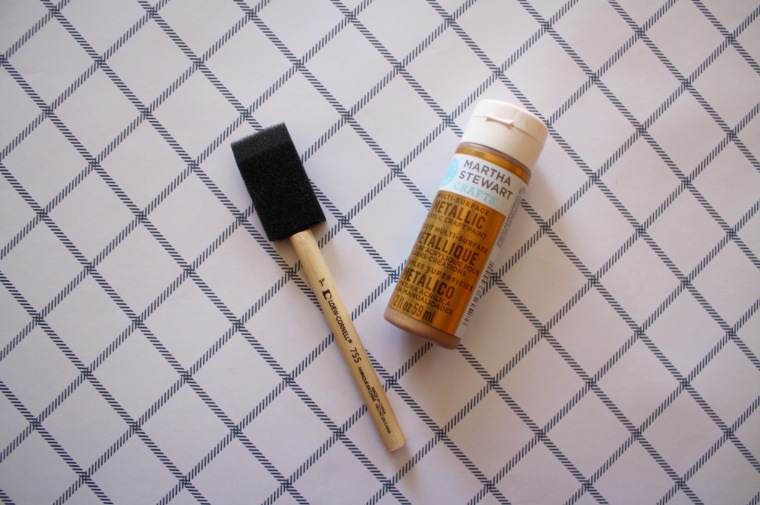
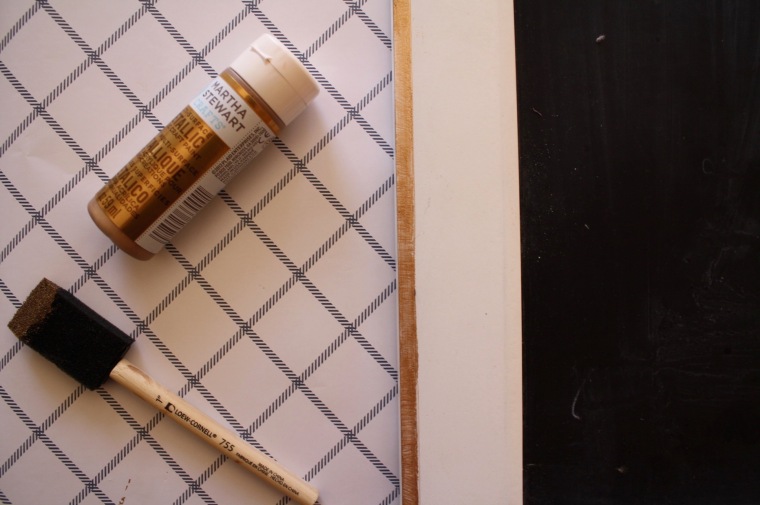
You will need:
- A foam paintbrush
- Metallic paint
- A ruler, a pencil, and scissors
This is a really inexpensive DIY! I bought the supplies at Joann’s, and the total was $4. I feel like if you overpay for a DIY, it takes away some of the fun. What makes this DIY so special is you can spruce up something for the cost of two coffees.
If you don’t want a gold line, no worries! Use whatever colored paint you have. Whatever floats your boat.

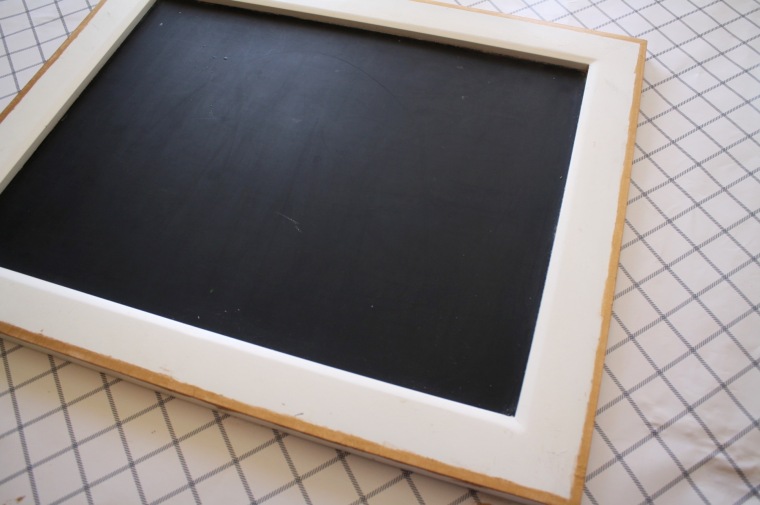
I began by taking a pencil and a ruler and making little marks around the perimeter of the chalkboard. Don’t be afraid to press down, because we’re going to paint over it. I made my gold line 1/4 of an inch wide.
If you aren’t using a chalkboard, do this step anyway! If you’re going to be putting a gold line on something with glass, you might need a marker, because pencil lines won’t show up.
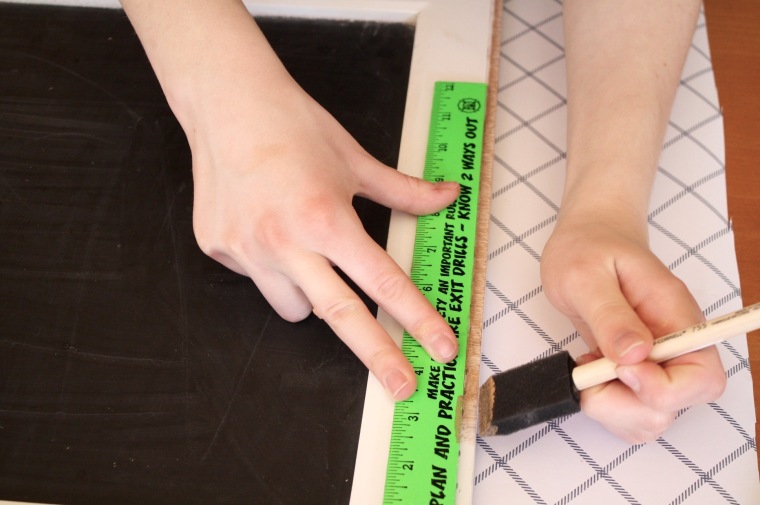
Now, it’s time to get our hands dirty! This is always the fun step, am I right?! If you have painter’s tape, you can use that so your line with be crisp. I didn’t have any, so I used my ruler.
Dip your foam brush into the paint and dab some off, and paint the line! Again, it’s important that you have a straight edge so your line will be crisp. This looks really easy–after all, it’s just a line…wrong! This step was really time consuming for me, because I wanted the line to be perfect.
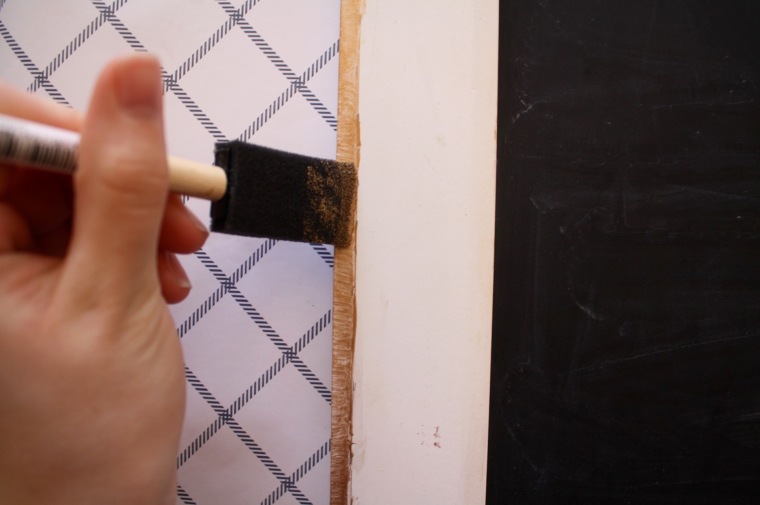
You may need to do a few coats depending on your paint. The paint I used needed two coats. I did mess up in a few places, but it doesn’t matter, because small flaws won’t show from far away, and the chalkboard is going to hang on my bedroom wall.

While the paint dried on the chalkboard, I grabbed a vase and some tape and decided to get creative. I made two crisp lines with the tape, and painted black & gold between the tape.
It took the same amount of time as the chalkboard, even though it was a small vase! The gold paint needed four coats, because it was barely showing on the glass.
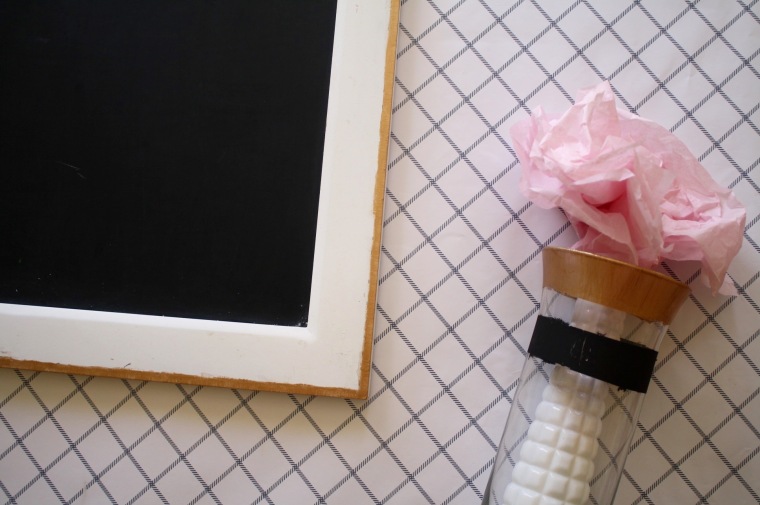
And voila! It turned out a bit odd in some spots, but that doesn’t matter, because it looks pretty awesome.
Would you look at that?! A fresh and new chalkboard and vase.
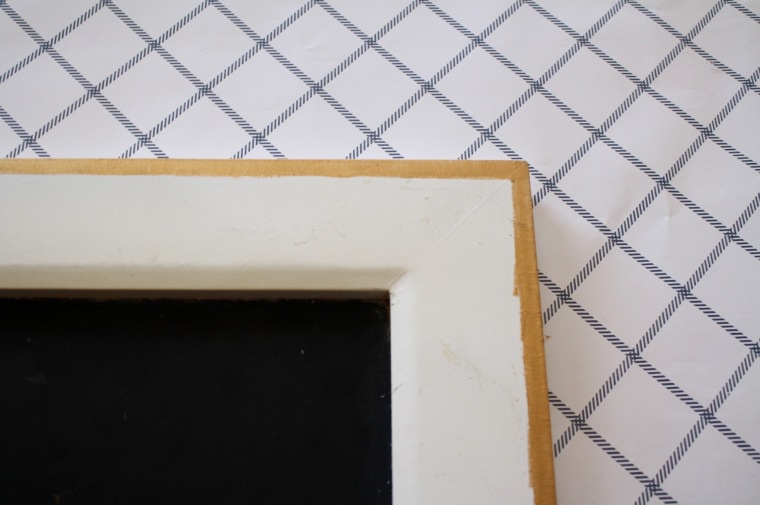
Here’s the before…
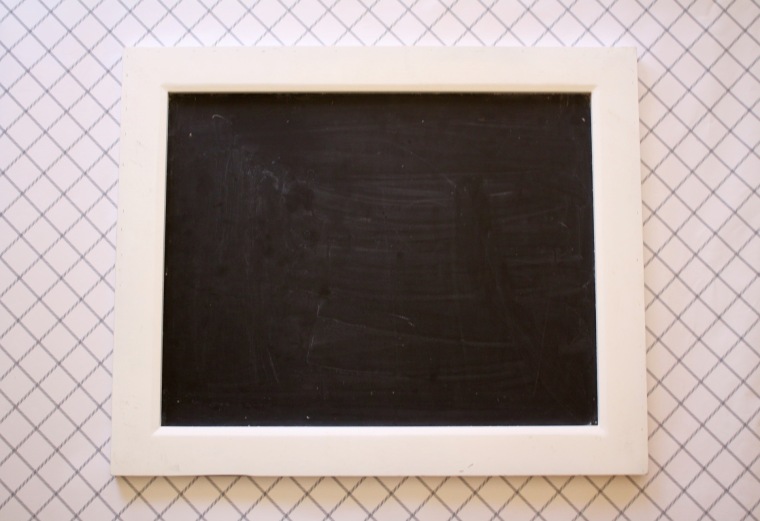
A boring, plain chalkboard. The after is pretty awesome, though.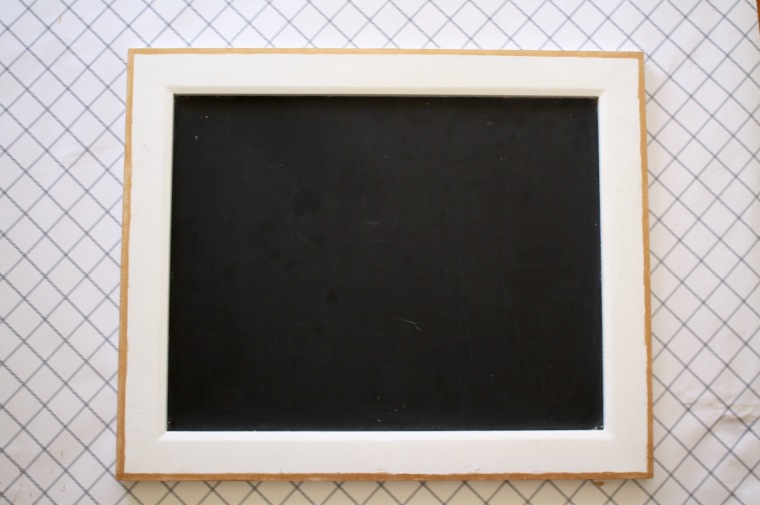
I still have some paint left, so I think I’ll try this on a mason jar or two! What do you think? Do you like it? If you decide to try this out, let me know how it goes! Have a great day, and thank you for reading.

|PINTEREST | BLOGLOVIN’ | CONTACT ME |

I love things like this – thank you for sharing! I’m going to give something like this a go for myself!
Lauren | http://www.thelifeofastudentblogger.blog
LikeLiked by 1 person
No problem–thank you for reading! If you try this DIY, I hope it goes well. 🙂
LikeLike
Looks great, well done ! ☺
LikeLike
Thank you so much, Sandra!
LikeLiked by 1 person
So simple and so cute! Love this xx.
LikeLiked by 1 person
Aww, thank you! Thanks for commenting & readings!
LikeLike
This is such a good idea! Great post! I love DIYs as you know 😉
LikeLiked by 1 person
Thank you! And haha, you’re the queen of DIYs!
LikeLiked by 1 person
Haha, I don’t think so but thank you !!!!
LikeLike
Ooh, awesome! I’d totally be perfecting the lines and everything if I did this — I’m such a perfectionist when it comes to things like that. XD
LikeLiked by 1 person
Haha, yup! It needs to be perfect!
LikeLiked by 1 person
This is super cool! I love your DIY posts and I realy need to try more THINGS LIKE THIS 🙂
LikeLiked by 1 person
YES YOU DO. It’s really fun! Thank you!
LikeLiked by 1 person
May I just say, thank you for the perfect timing! I’m sick and off school with nothing to do, so you putting this up is just brilliant for me, I’ll definitely have to do it!
~Emily x
LikeLiked by 1 person
You’re very welcome! I hope you feel better!!
LikeLiked by 1 person
Thanks!
LikeLike
Hey Abigail!!
I love your blog. It’s so pretty and well-put-together!!
I love how your photos look, and I would love to know what kind of camera do you use?
LikeLike
Hi! Thank you so much, you just made my day! I use a Canon camera! I’m actually doing a post on Wednesday about how I take and edit my blog pictures, so if you want to learn more, stay tuned for that! Thank you so much for stopping by!
LikeLike
Thanks Abigail, can’t wait!
LikeLiked by 1 person
This is such a good idea, LOVE chalk boards!
https://novodesignsco.wordpress.com
LikeLiked by 1 person
Thank you, I am obsessed with it!
LikeLike
LOVE the gold metallic paint! I have been wondering whether Martha Stewart paint was worth the extra couple bucks, and it definitely looks like it is! Very cute DIY!
LikeLike
It totally is! Thank you! xx
LikeLike